Deploying games to a Raspberry Pi / IoT device
If you are interested in building your own inexpensive gaming consoles, or running your game as a distributed system across many devices, we’ve some great news for you: Clockwork allows you to run your game on IoT devices, such as the Raspberry Pi, Intel Joule or Dragonboard 410!
By deploying Windows 10 IoT core on the device, you can run the runtime on it to deploy and debug your games (while having full access to the native APIs!), and finally use the UWP bridge to export it as an app ready to be deployed on any device.
If you are interested in doing so, first you should head to the Windows 10 IoT webpage and follow the steps to flash your device.
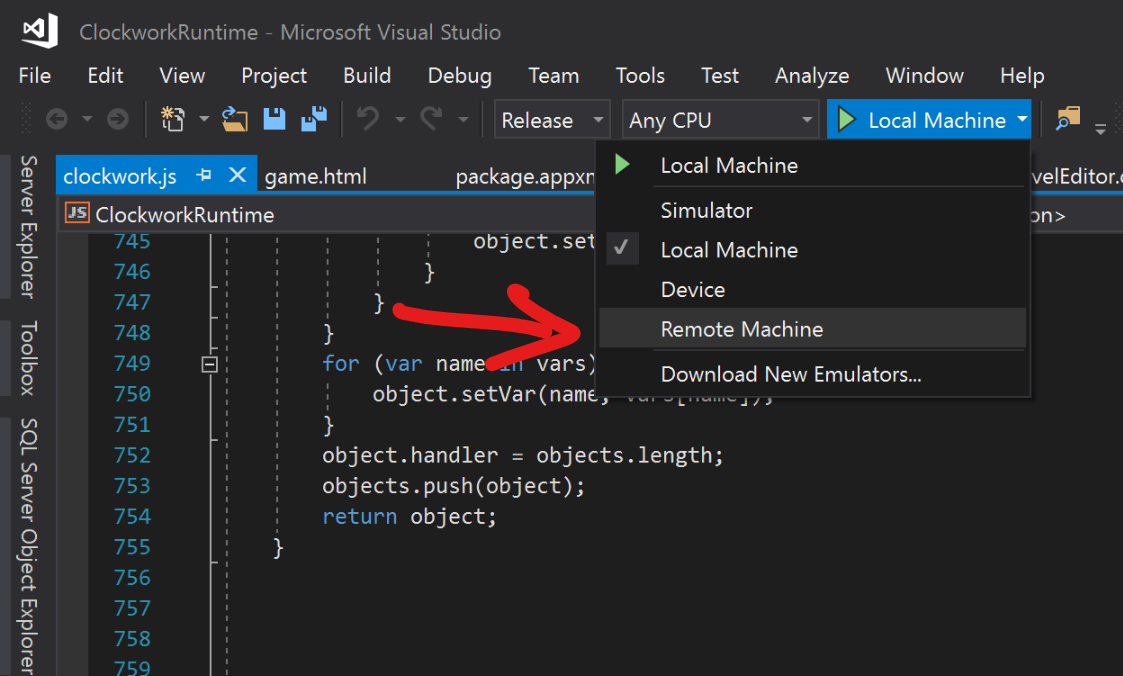
In order to deploy games to your device you will first need to install Clockwork Runtime, the same app that allows you to develop games on your PC. However, since IoT devices don’t have access to the store, you’ll have to deploy it manually. You should download the source code from this srepo, open it with Visual Studio, and select a remote machine as the deploy target, as depicted here:

You will be prompted for the IP of the IoT device, which will be shown in the screen attached to it (you should definetely attach a screen if you are developing a graphical game!) or can also be found in the IoT dashboard app.
Now, you can press F5 to deploy the runtime to the IoT device and launch it. You can then use the IoT dashboard app to select it as your startup app so every time the device powers on it will be launched.
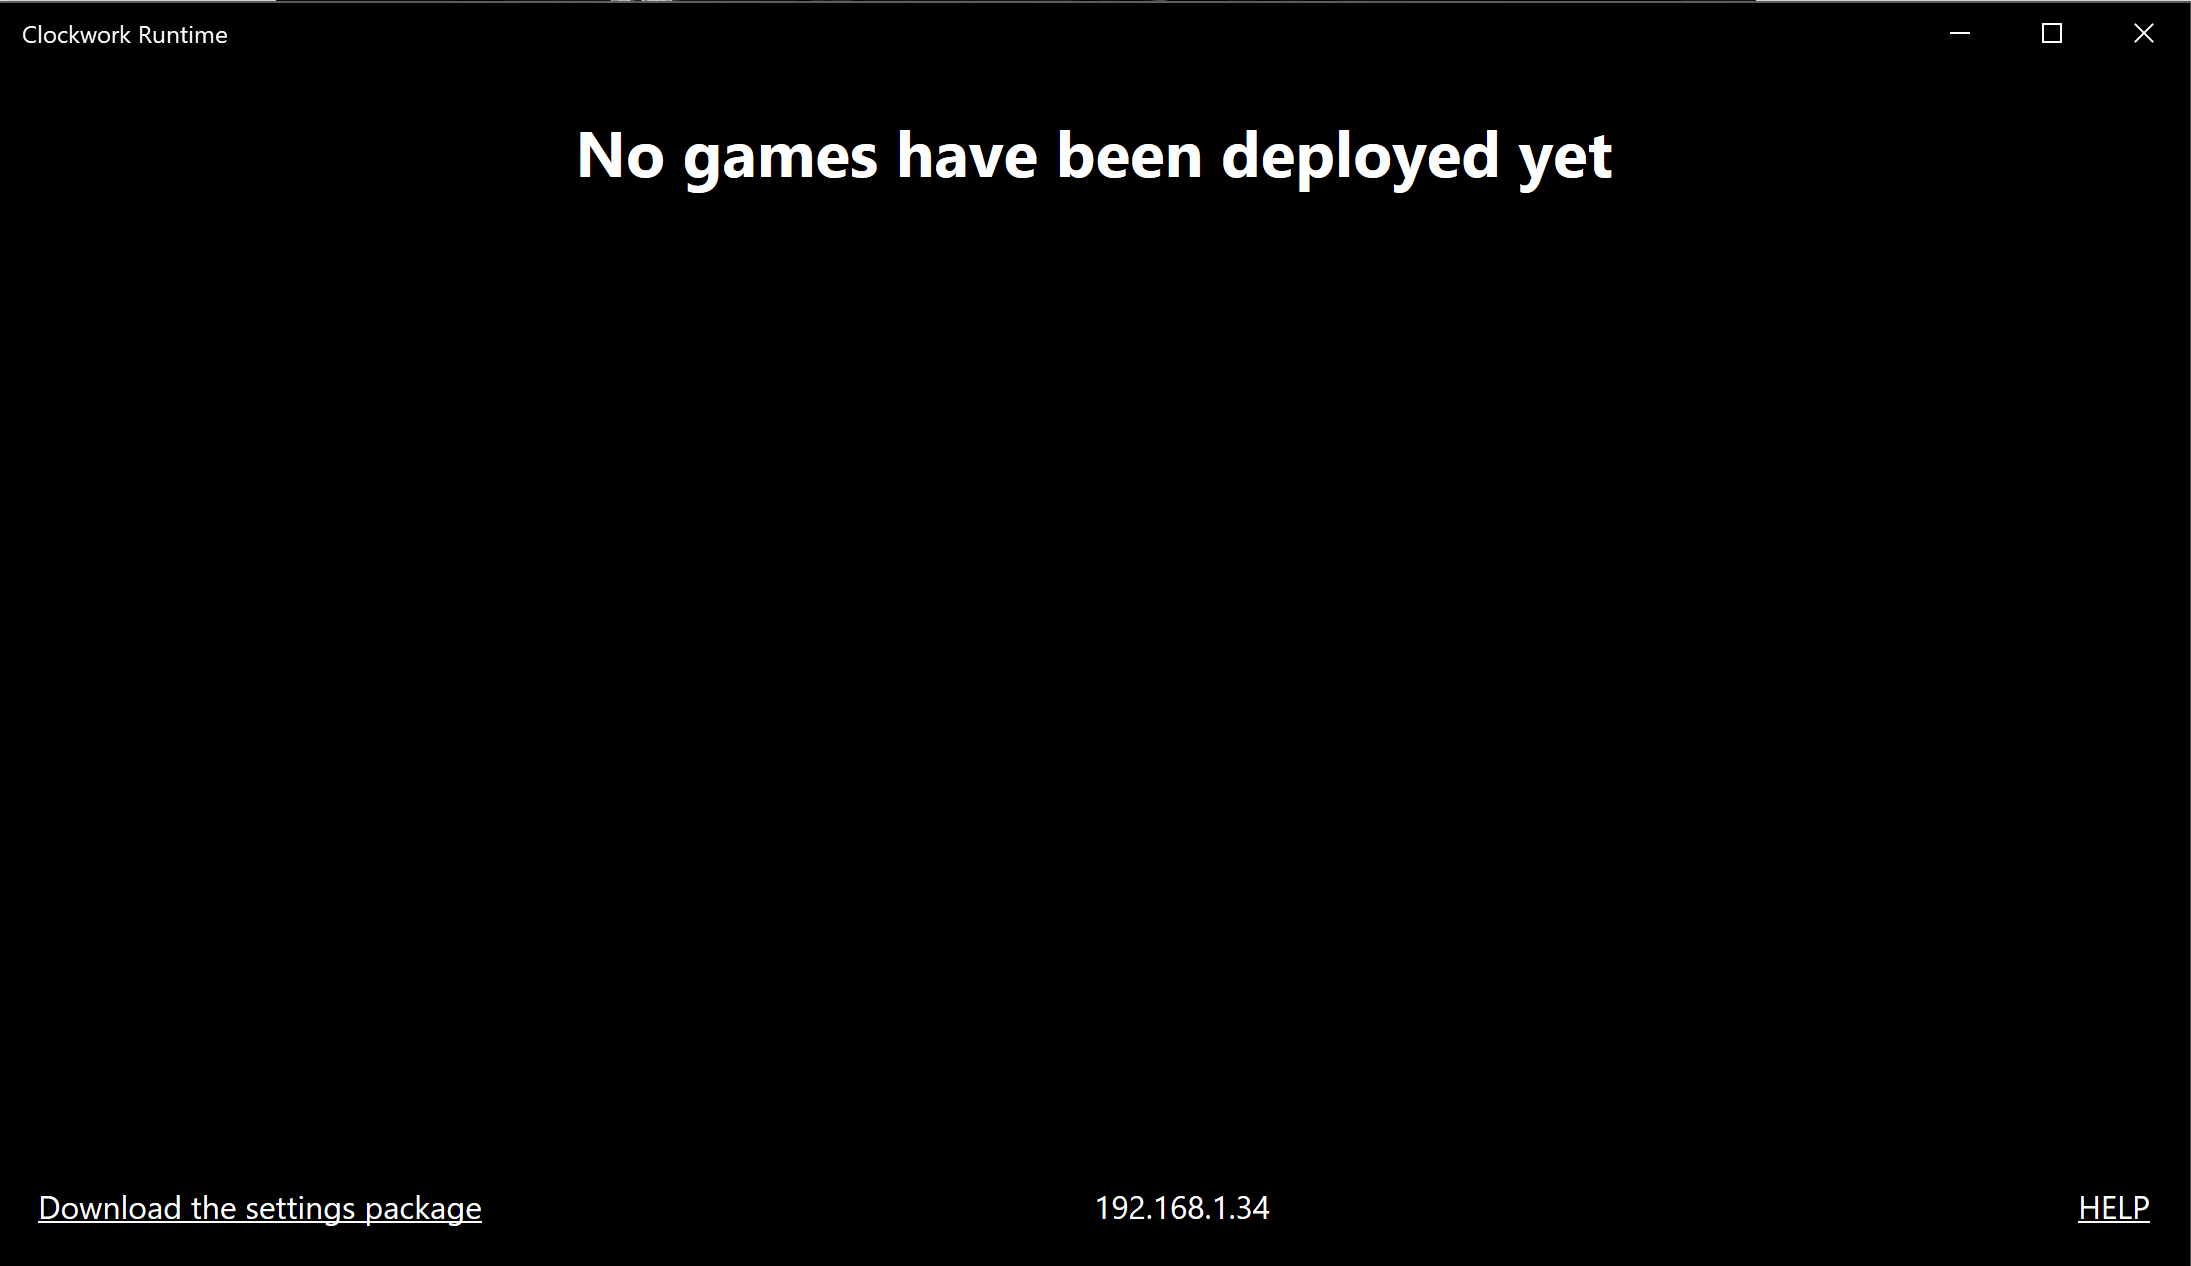
Once you have the runtime set up in your device, make sure it is connected to the same local network as your development PC. Then, launch the app in the console and you will be greeted by a screen similar to this one:

The IP of the device, which will be useful later on, is shown at the bottom of the screen.
Now, open the game project with Visual Studio Code, press F1 and execute the Deploy Clockwork project to a remote machine command. You will see that the device starts installing the game package, excatly the as if you were deploying it on your PC!
Unless you have a mouse attached to your device you will need to launch your game in debug mode. In the game project, open .vscode/launch.json (the file used by Visual Studio Code to know how to launch the project), and you will see something like this:
{
    // Use IntelliSense to learn about possible Node.js debug attributes.

    // Hover to view descriptions of existing attributes.

    // For more information, visit: https://go.microsoft.com/fwlink/?linkid=830387

    "version": "0.2.0",
    "configurations": [
        {
            "type": "clockwork",
            "request": "launch",
            "name": "Debug game",
            "program": "${workspaceRoot}/manifest.json",
            "levelEditorEnabled": false
        }
    ]
}
When you create a new project, there is only one launch configuration defined, that allows you to debug games locally. We need to add another one that will point to our device, using the IP that is shown in Clockwork Runtime:
{
    // Use IntelliSense to learn about possible Node.js debug attributes.

    // Hover to view descriptions of existing attributes.

    // For more information, visit: https://go.microsoft.com/fwlink/?linkid=830387

    "version": "0.2.0",
    "configurations": [
        {
            "type": "clockwork",
            "request": "launch",
            "name": "Debug game",
            "program": "${workspaceRoot}/manifest.json",
            "levelEditorEnabled": false
        },
        {
            "type": "clockwork",
            "request": "launch",
            "name": "Debug game on remote device", //You can choose any name you want

            "program": "${workspaceRoot}/manifest.json",
            "remoteMachine": "192.168.1.36", //Here you need to place the IP address of the device

            "levelEditorEnabled": false
        }
    ]
}
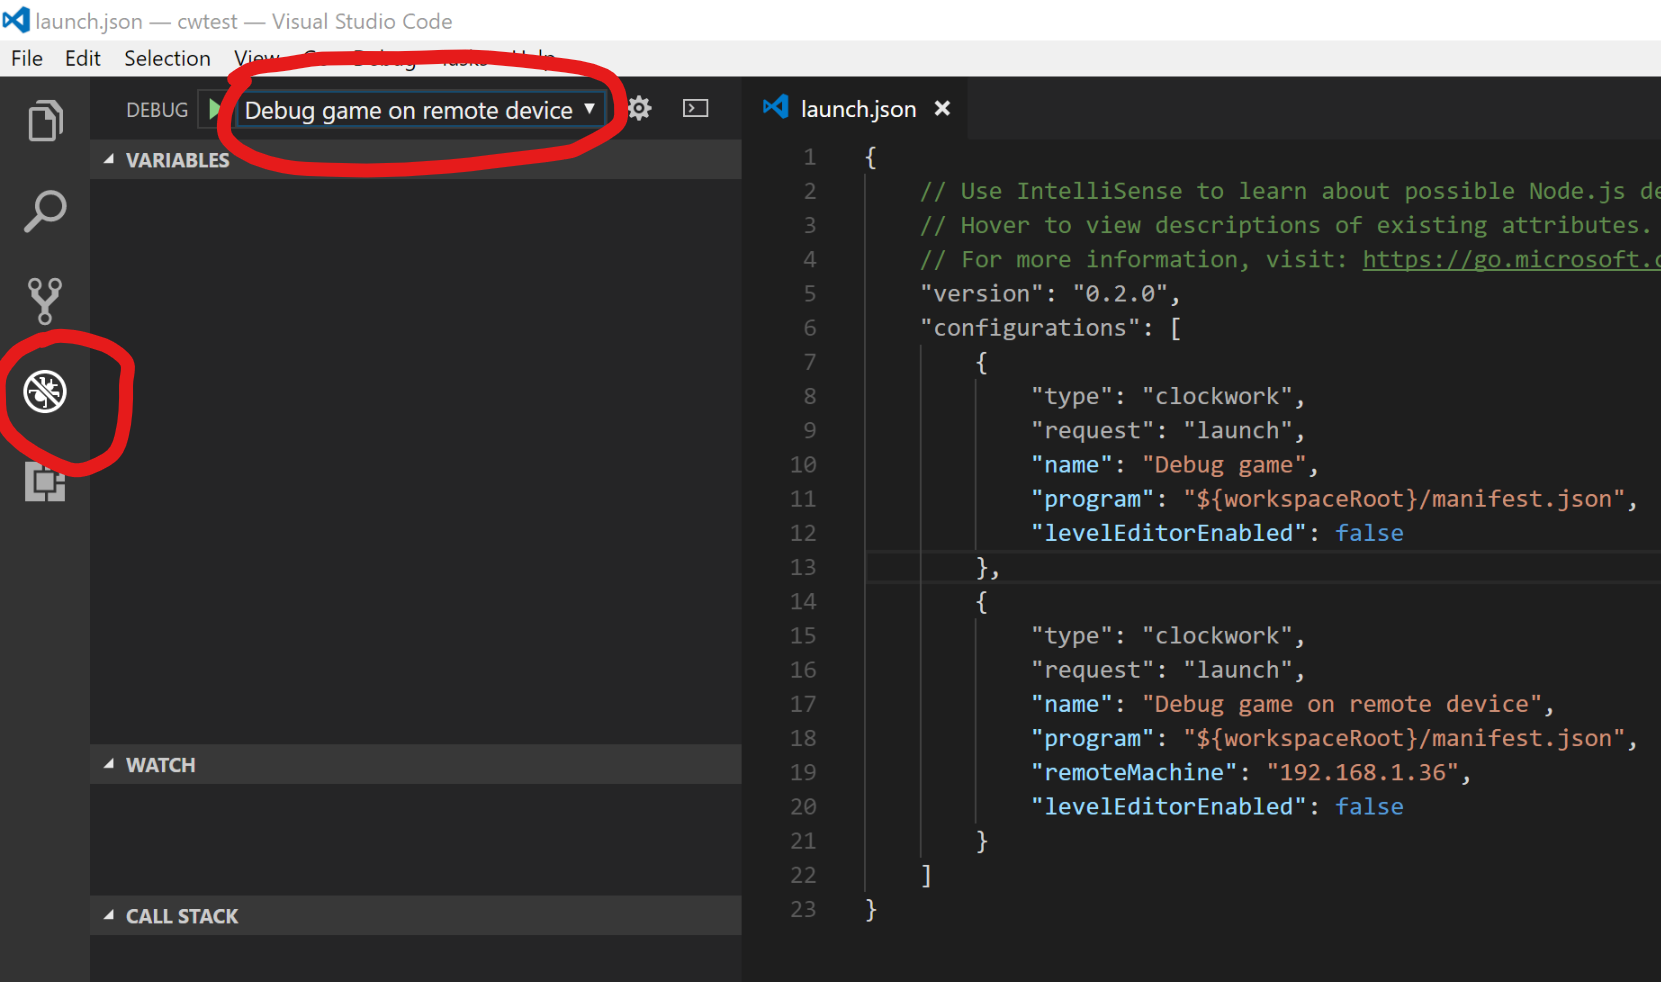
Finally you just need to open the Debug panel and select the new debug configuration:

After pressing F5 the game will launch on the device, and you will be able to see the log on real time on your PC!
Have fun developing your IoT game, here are some extra tips:
- You can use some UWP APIs to access the GPIO pins.
- When you finish your project, you can use the UWP bridge to generate app packages!
 Clockwork Blog