 Clockwork Blog
UWP Bridge

To allow developers to publish their games in different platforms, Clockwork offers a set of bridges, programs that will export Clockwork games (.cw) to native apps. One of these is the Universal Windows Platform Bridge, which generates Visual Studio solutions from your games so they can be uploaded to the Windows Store and played on any device running Windows 10.
Generating the solution
In order to use this bridge, open your game’s folder in Visual Studio Code and press F1 and write Export game using the UWP Bridge. Clockwork will then create a folder named uwp for you. Inside it, you will find the Visual Studio solution. Now you can open it in Visual Studio by double-clicking the .sln or opening it from VS.
As any other VS solution, you can now run it in your computer or in another device (like a phone running Windows, for example)and you can also upload it to the Windows Store.
Windows Store
To upload applications to the Windows Store you will first need a developer account, which requires a one-time registration fee for individuals and companies, but is free for students, and doesn’t need nenewal.
When you have it, open your VS solution and go to Project > Store > Create App Packages… It will ask you if you want to create packages to upload to the Windows Store, continue. Now it will check your developer account and show you all your created apps from your developer dashboard so that you can choose for which app this package will be, or you can simply create a new one from here by reserving an app game.
You should get to this screen:
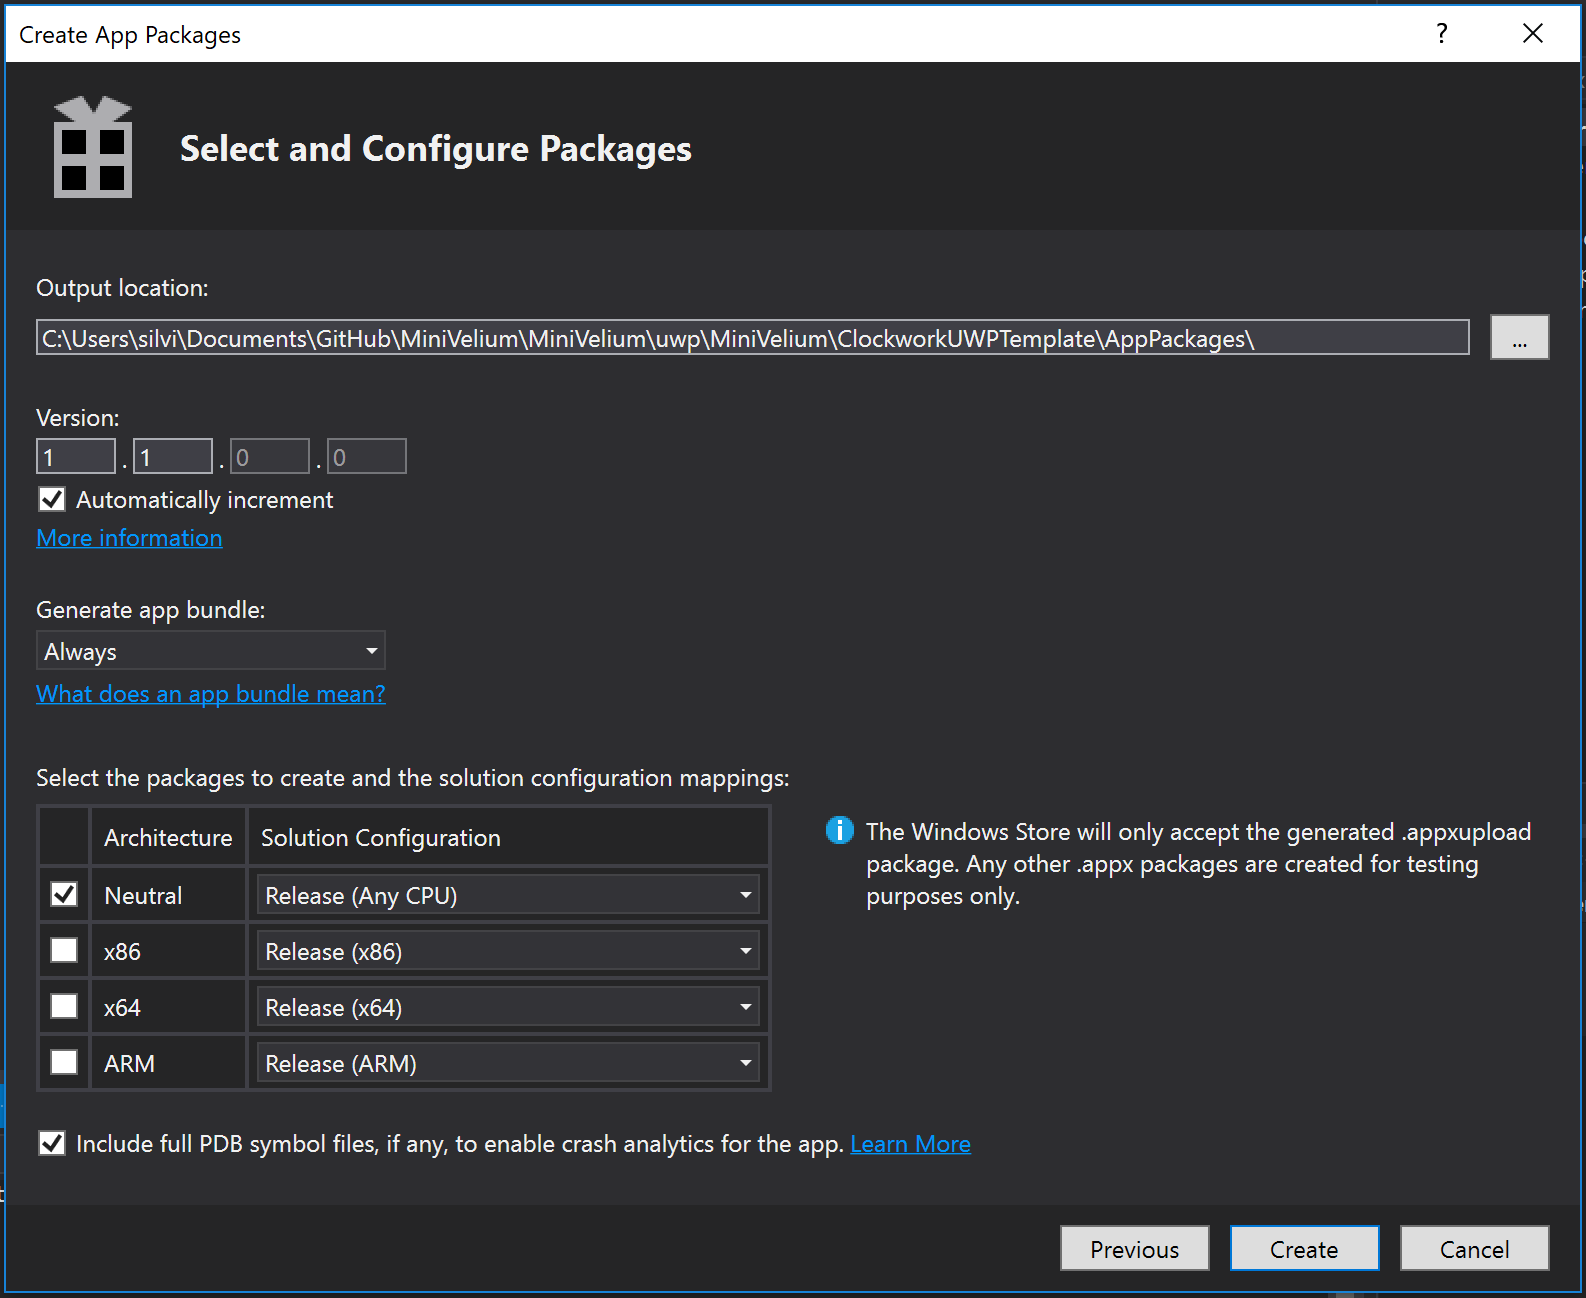
Here you have the output location where you want the packages to be generated the version of the application (which increments automatically), and the packages you want to create. If you don’t know what to touch here, just leave the defaults, they are just what you need. :)
When the package is created, Visual Studio will prompt a window from which you can access the folder with the packages. It will also ask you where you want to run the validation. Usually, you’ll want to do it in the local machine but you can also use a remote machine if you need to.
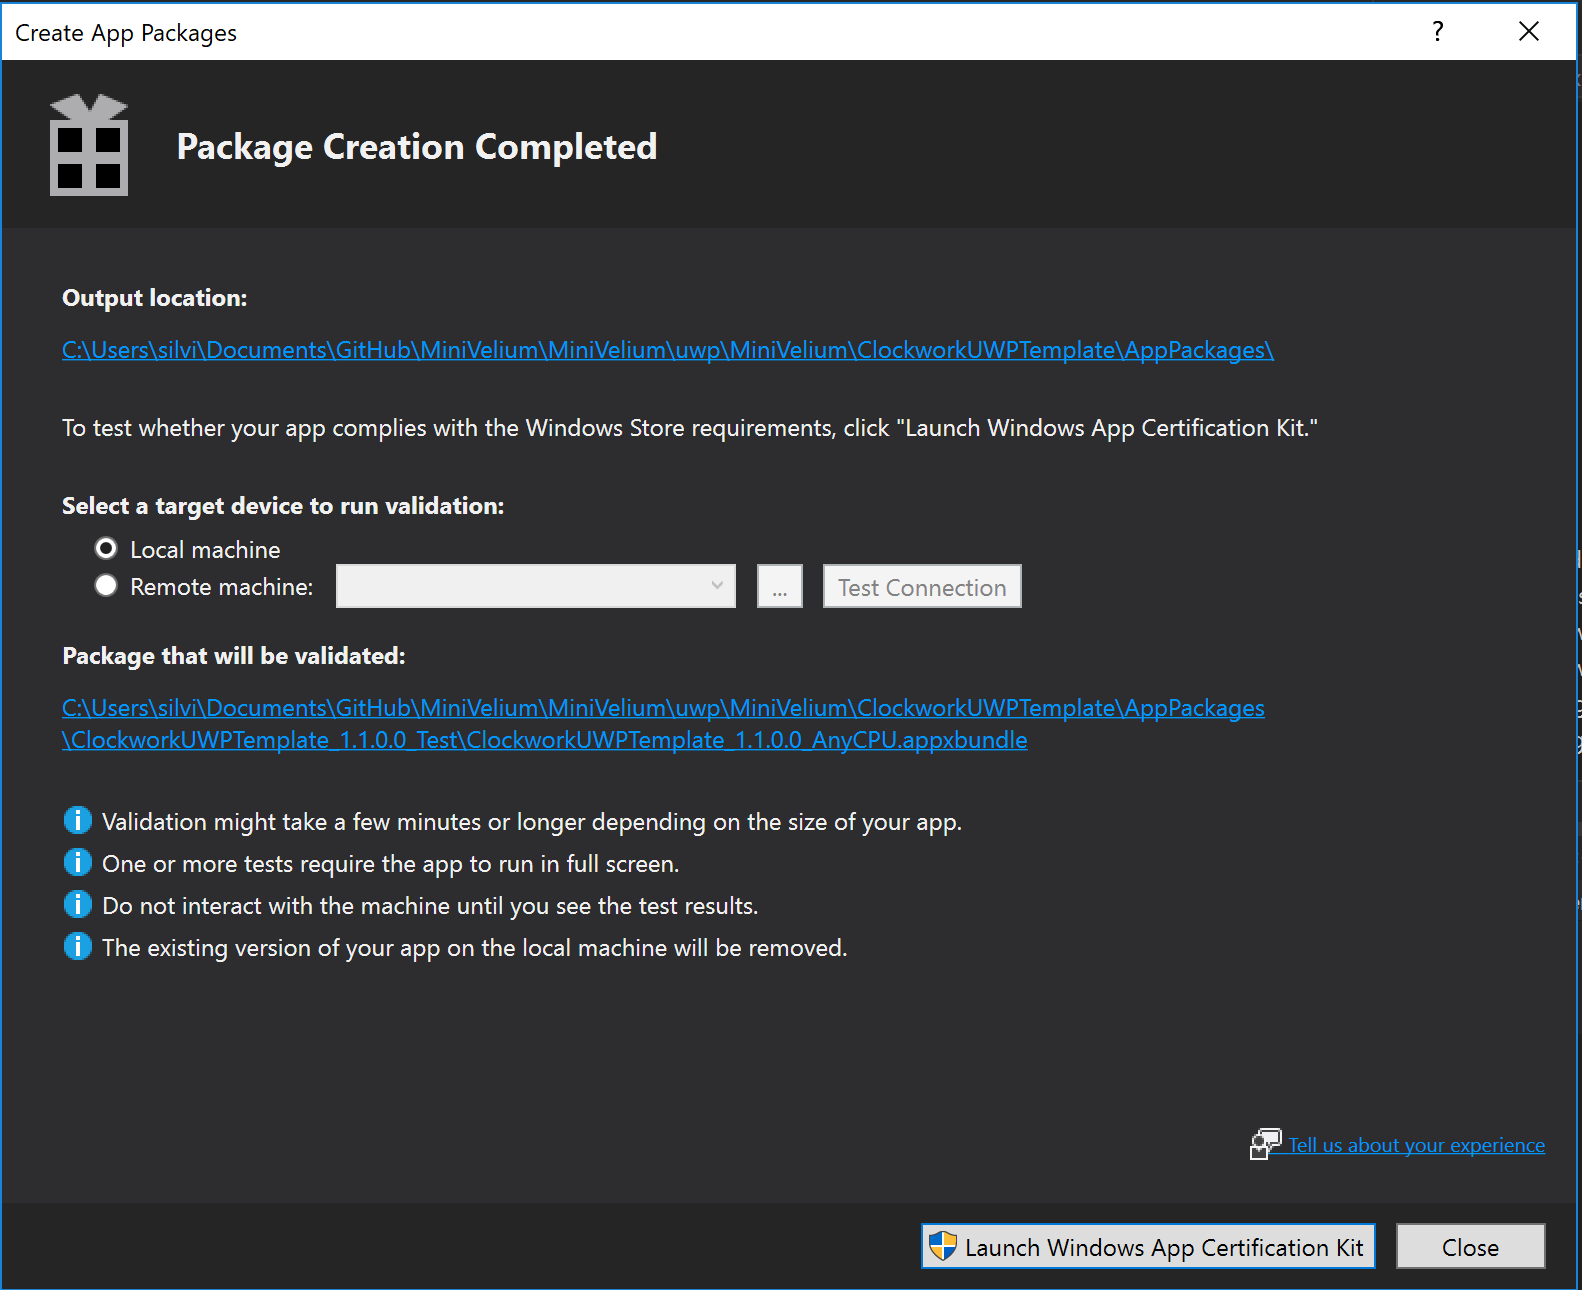
Launch the Windows App Certification Kit and leave the comuter alone. This validation will start opening your application and closing it a couple of times to test several things. Once it’s done, a window will appear with the result. If your app didn’t pass the certification, it will tell you why so you can fix it.
Now go to your developer dashboard and choose your application.
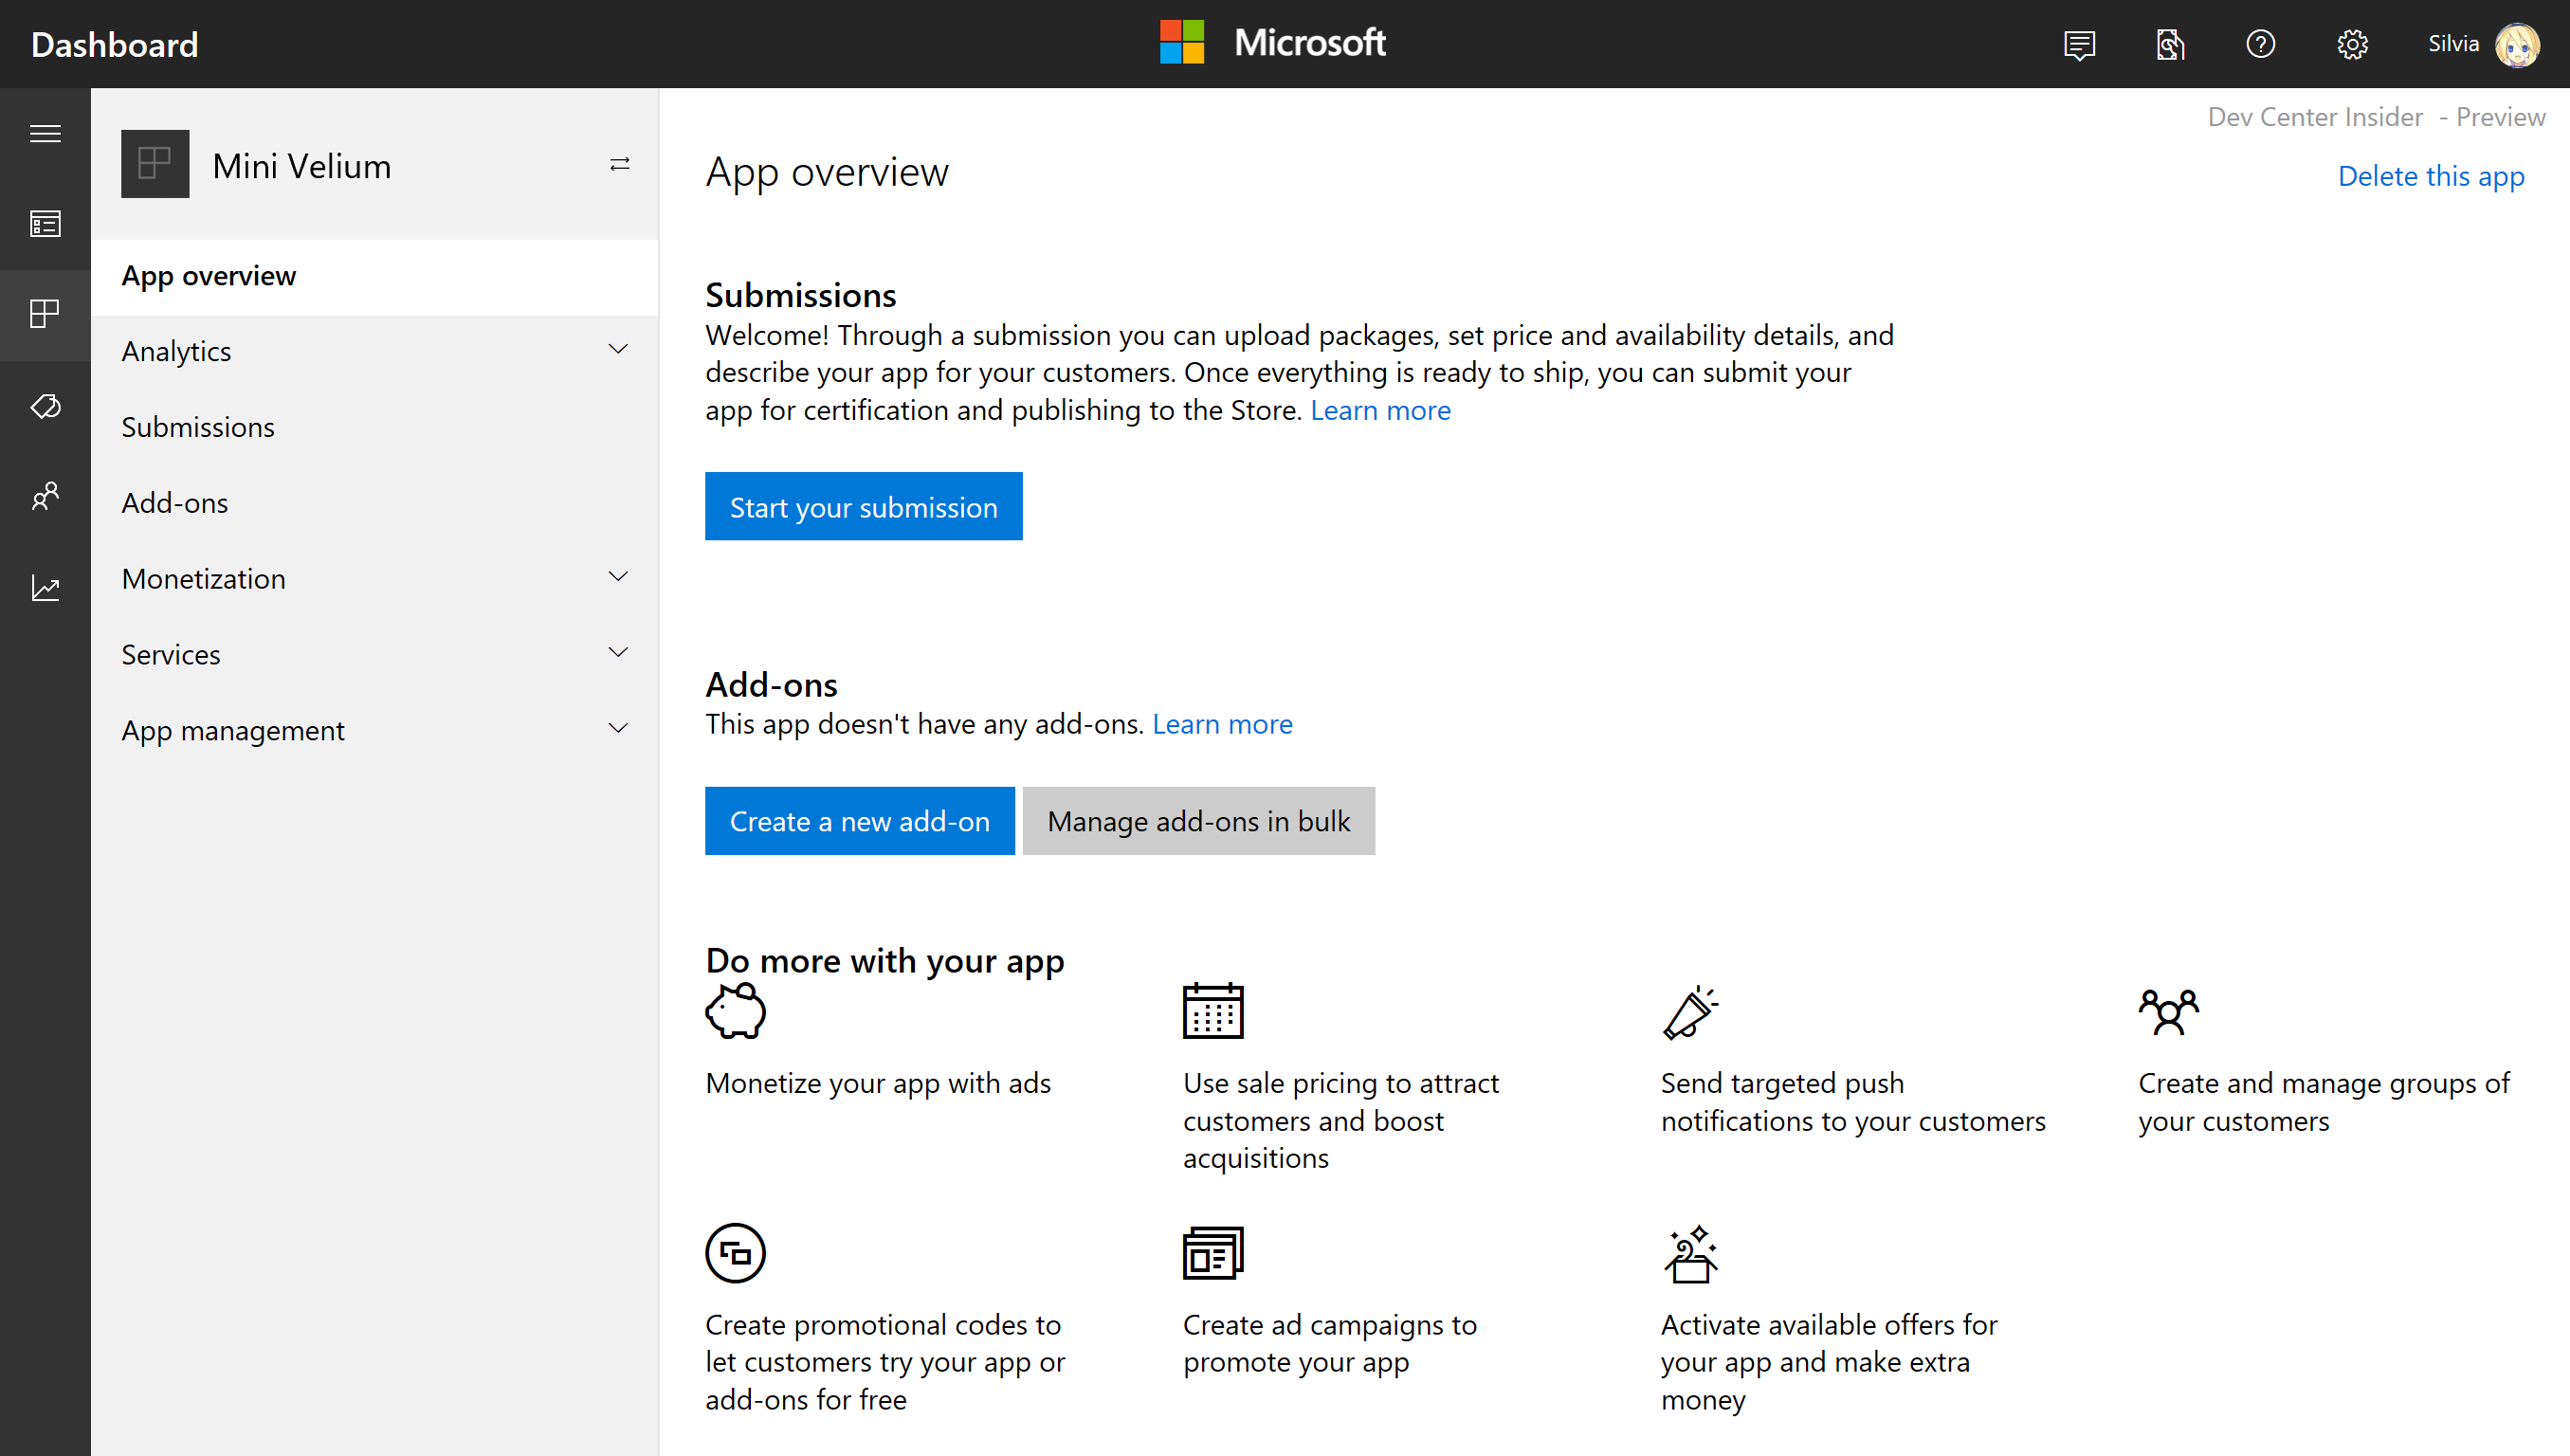
Hit the Start your submission button and you’ll arrive at a screen where you can prepare your game for the store. Everything is pretty straightforward from here.
When you arrive to the Packages section, you’ll see this:
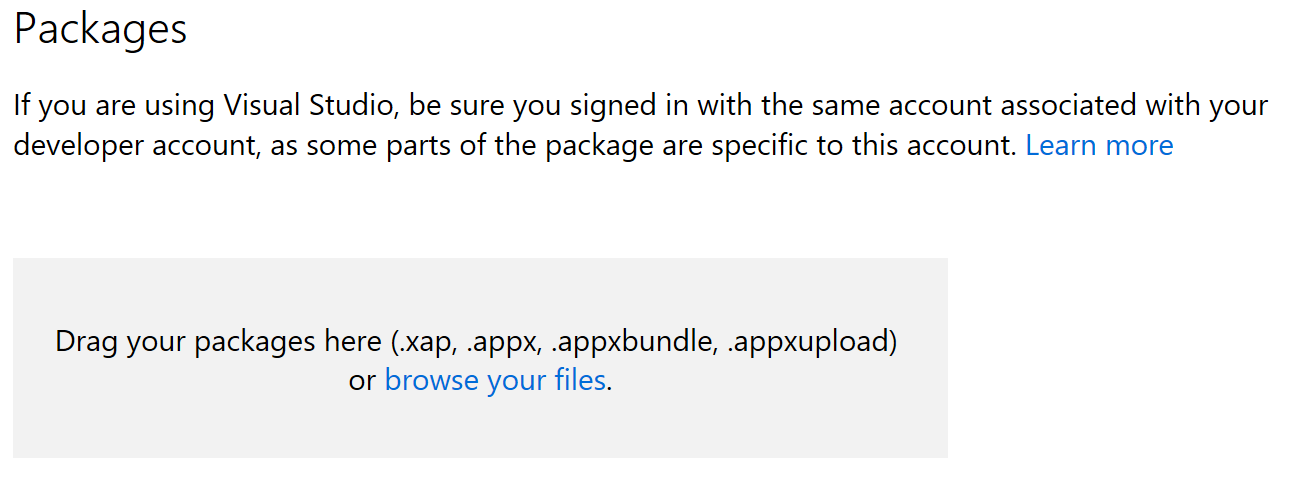
Here is where you need to place what you generated in Visual Studio; find your appxupload file and put it in there.
When you are done with everything, you can submit it to the store and it will start a process of certification. It can take from a few hours to a couple of days but you’ll receive an email once it’s done and you’ll get the url of your game in the store. It will also be found when searching if you allowed it. And that is all! You’ll soon be able to brag to your friends about having an app in the Windows Store. 😎